

Wandering Pine is reader-supported. When you buy through our links, we may earn an affiliate commission at no additional cost to you. Thank you! Learn more.
Have you ever thought about making your own backpacking gear? This week’s post is about my experience sewing an ultralight backpack. There are lots of reasons to do it yourself, including: financial, weight savings, customization and just learning something new!


Last year, I remember making this time-lapse video and feeling like I had really pared my gear down at 32 lbs, including 2L water, a week’s worth of food and without splitting gear. Now it seems like a LOT of stuff! I could go on and on about the benefits of simplifying and letting go…
…but this is a post about making a super cool backpack!
This project started last year as a math problem. As I was working on my SHT gear spreadsheet, I realized my heaviest piece of gear was my backpack at 61 oz, that’s almost 4 lbs empty. My previous backpack was heavier than that! I love my Osprey Aura 50, it fits like a glove and is a great load hauler, but it wasn’t going to help me get to my goal of a 25 lb pack weight.
I spent hours researching packs online, talking to friends, and it was still really overwhelming. I just wanted something super basic that would work. About 5 years ago, a fellow Scouter told me about making a Ray Jardine backpack kit when he was headed to Philmont. Took him about 40 hours and I thought he was nuts…
The Ray-Way website shares the story of Ray Jardine’s adventures and sells various kits you can sew yourself, including tarps, quilts, bivy’s and the legendary Ray-Way Backpack.
Profile of Ray Jardine, author: Trail Life, The Ray-Way Tarp Book Essential, Beyond Backpacking, Siku Kayak, The PCT Hiker’s Handbook. inventor: “Friends” rock climbing gear. Long-distance hiker, designer and builder of aerospace composite kayaks, Baja and Arctic Alaska sea kayaker, Canadian Barrenlands canoeist, cross-country hang glider pilot, round-the-world sailor, free-fly skydiver, and more.


I ordered the kit for under $100 a about a month ago and it arrived in just a few short days. I waited to start in order to dedicate time to doing it (after all, it took my friend 40 hours). Everything you need (other than a few notions) are included in the kit. Its completely flat when it arrives and very efficiently packaged. Included are 3 different weights of fabric, mesh, various clasps, and cord. Do yourself a favor and spring for the special thread, it’s super strong and might be the thing keeping your pack from exploding on the trail.
Important Note: My intention of this post is NOT to share how to make the pack. There are a few pattern pictures but they are purposely vague so you can enjoy the experience for yourself and support a cottage business like Ray & Jenny Jardine’s.


I made my wedding dress 25 years ago, but that took a few months, and only needed to be worn for a day. Since I haven’t sewn much other than Boy Scout patches or curtains since then, I was a little nervous about making such a critical piece of gear. Other than a few steps that I had to read out loud to myself, the pattern is pretty clear and does not require a ton of sewing experience. I was surprised at how much manual measuring there was, and how few pattern pieces there actually were. It felt less like a sewing project and more like building something in the garage!
Aside from my super cool Superior Hiking Trail Patch, and adding a whistle chest strap, I did make one customization that I’m pretty stoked about: A full sized bottom pocket!


This pocket is for easy access to snacks, or anything else you don’t want to take your pack off for or bug your buddy to grab while you are on the go. I saw this on another pack design somewhere and I thought it was genius!


The fabric is upcycled from a pair of Solomon running tights I bought at an REI Garage Sale that ended up being a tad see thru. The fabric was so cool, I kept them and intended to make them into pack strap water bottle holders . If you want to add a bottom pocket to your kit, just cut the fabric to fit the bottom flap before it’s sewn in place and layer it in. Before sewing, I pulled the side that would be the opening a little taut and inserted the stretchy Solomon drawstring into the hem of the pant leg for a drawstring pocket closure. Don’t want those snacks falling out!


To my delight, today I discovered that my little snack pouch can be flipped inside out and store the whole backpack inside! Its my favorite part of my pack and I can’t wait to test it out. If its a flop, I can just cut the thin fabric off without affecting the design.


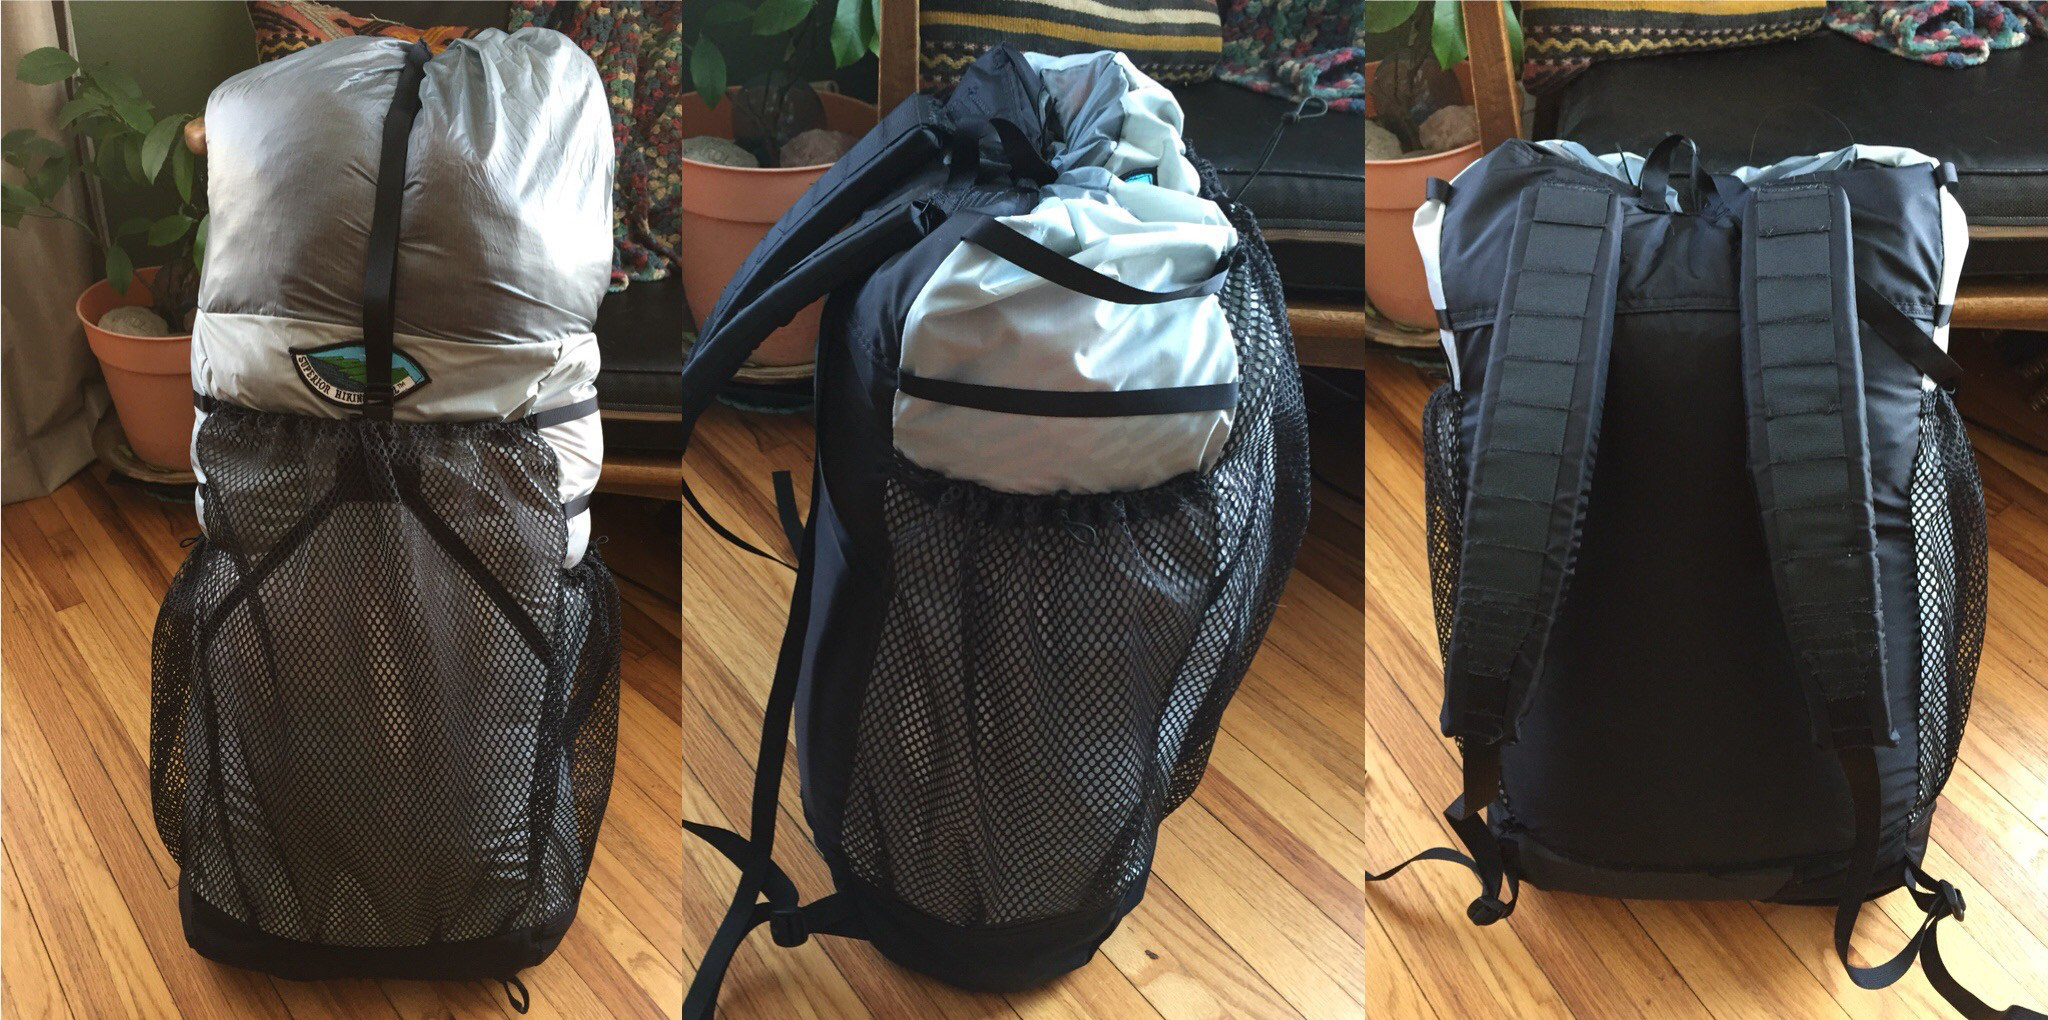
Here are the photos of the (nearly) finished product! It wasn’t until I stuffed it full for the picture that I realized how HUGE this pack is. PLEASE NOTE: the RayWay packs only call out the Cubic inches of the main body, and do not include the mesh or extender panel, so I ended up ordering a larger capacity than I needed (but I’m not sewing another one!).
Main Body: 2600 cubic inches/42.6L
Mesh Pockets: 400 cubic inches/6.55L
Extender: 1600 cubic inches/26L (approx)
Overall Capacity = 74L (!)
The recommended max load for a frameless pack with this type of construction is 25 lbs, so I will test it this summer with the extender and if I don’t like it, I’ll shorten it up to prevent the temptation to overpack. Still planning on adding a second drawstring to the pack body to help shrink it up when the extender is not in use.


Here’s the finished Pack with chest strap and smaller top drawstring closure added. I had a whistle clasp so I upgraded that from the one that came in the kit.
All in all, it took around 20 hours to sew and I now have a sub 1 lb backpack that I can take pride in making. It was so fun to be able to hyper-focus on the project and make a critical piece of gear. I’ll be testing it out in a couple of weeks and will report back!
Have you made any of your own gear? I’m curious about tarp making… I’d love to hear about gear you’ve made, upcycled or hacked out of other stuff, post it here!
Happy Trails!
~WP