Wandering Pine is reader-supported. When you buy through our links, we may earn an affiliate commission at no additional cost to you. Thank you! Learn more.
There’s an old saying that says, ‘There’s no such thing as bad weather, only unsuitable clothing.’

It’s a new year and it’s time to start the 52 hike challenge again! If 52 hikes isn’t your thing and you needed another reason to hike today, there’s also an event led by the American State Parks in all 50 states called First Day Hike to get folks out on the first day of the year!
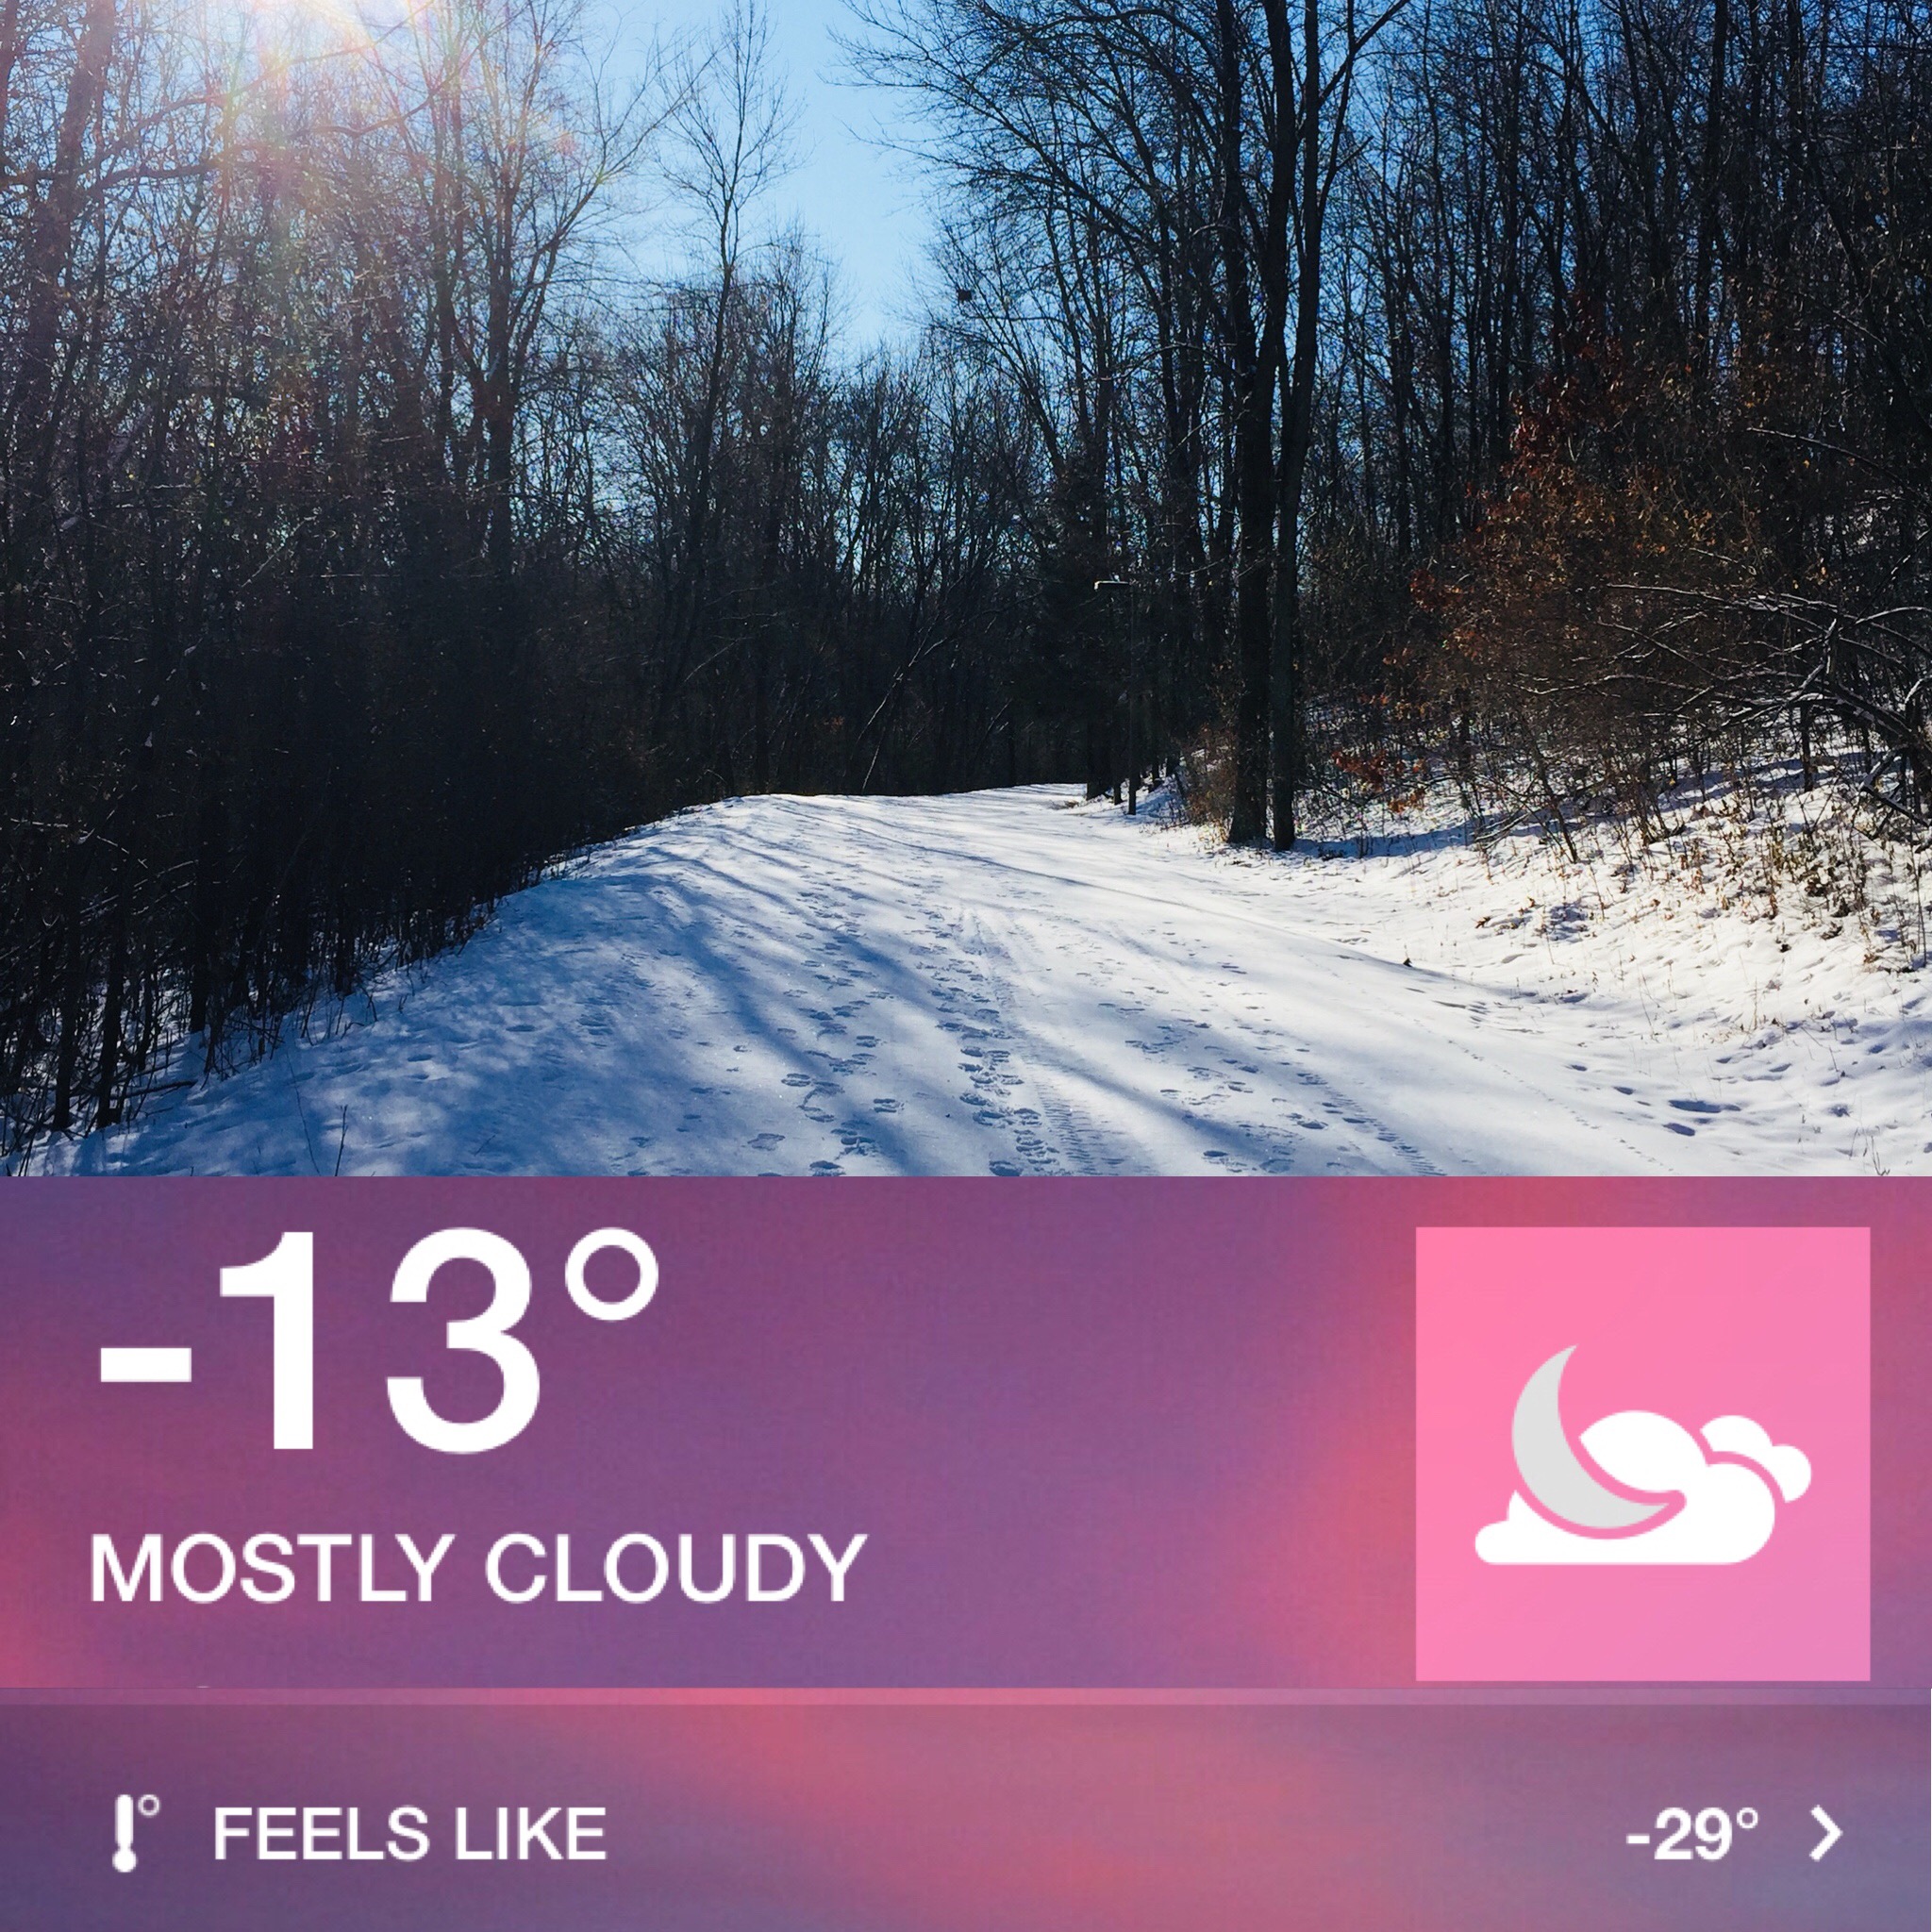 Hike #1 presented bitter cold temps and wind chills here in MN. According to the news, much of the nation is in an icebox this week and part of Pennsylvania is buried in 60” of lake effect snow! My blog/social media feeds are buzzing with Canadians boasting negative double digits and Floridians shivering in the 50’s. Cabin fever is widespread and cold is relative, for sure.
But if you know how to layer, it’s never too cold to go outside. So here are a few tips, whether you are sub zero, sub 60 or completely buried in snow, to help ya get through this cold snap.
Here’s my official 4 layer cold weather clothing system.
 There are traditionally only 3, but socks & underwear deserve a shout out in cold temps!
Layering Basics
1. Socks and Underwear: Synthetic or wool and should wick moisture away from you. Avoid cotton and non-wool natural fibers, they will absorb moisture and freeze your butt off. Better to go commando if you only have cotton undies.
2. Base Layer: Lightweight synthetic or wool, or wicking athletic clothing. Should be tight to the skin and wick away sweat.
3. Mid Layer: Fleece or warm pant and top. This should be a little thick or puffy to trap in the warm air. This is the layer that’s easiest double up or remove based on temps. You can also add a down or synthetic puffy jacket or vest to add warmth. Basically anything that is kind of fuzzy or puffy and not made out of cotton.
4. Outer Layer: Hard shell jacket and pants as a windproof/waterproof layer. Think of this layer as the layer that traps in all of that warm air in your mid layer and keeps the elements from stealing your precious body heat.
Important: You can spend a fortune on outdoor gear, but most of mine comes from thrift stores, Craigslist/Marketplace or gear/clothing swaps. REI Garage Sales are also another great resource, check out my post about how to make the most out of these sales. If you have the time, learning how to make and improvise what you need is really the best and can save you some serious dough!
How to Choose
Layers are a personal preference and mine are different every time. What I choose depends largely on temperature and what I think my activity level will be like.
If I am snowshoeing or hiking, I wear light merino wool layers and stick a puffy jacket or vest in my pack for back up. If I am going to be standing around a lot or sitting outside, I will go with multiple mid layers and add an insulated skirt or bigger coat with winter boots to my system. If I am camping and will have periods of exertion and rest, I make sure I accommodate both activities.
After overheating a few times on winter hikes, I am starting to bring less and focus on moving and eating more high calorie foods to heat up internally. As you are figuring your layers out, you may want to put on more to start and bring a daypack that you can discard layers into. Paying attention and adjusting your layers and activity level to try to avoid sweating will also keep you warm. Damp clothing cools of really quick when you stop moving.
Winter Hiking Clothing and Gear List
Here’s my gear list for today’s sub zero hike! The fur hat, mittens and balaclava were added since it was so cold, but the rest is what I usually wear in single digit to below zero degrees.
Clothing:
 Underwear & Socks:
- Smartwool PhD sports bra and shorts. My year-round faves are Stoic Merino Wool Shorts.
- Darn Tough Wool socks, they just keep on truckin! I have friends that sent their holey socks back after some hard use and Darn Tough stood by them. Totally worth the investment. Available at Backcountry, REI, Campsaver, Outdoor Gear Exchange and Moosejaw .
 Base Layer:
- Wicking tee or lightweight fleece- lately I go for the lighter weight base on top.
- Lightweight fleece pant, PJ pants work great too.
- Fluffy, high pile wool hiking socks-I normally just need one pair, but sometimes add a second if I’m standing around a lot.
 Mid Layer:
- Lightweight fleece shirt
- Lightweight Wool jacket
- Fleece lined yoga pants
- Lightweight synthetic or down puffy jacket *Not pictured, usually stashed in my backpack just in case. (My first puffy that lasted for YEARS was an inexpensive packable down jacket from Target and served me very well) I upgraded to the Enlightened Equipment Torrid Jacket and it’s held up great too!
 Outer Layer:
- Windproof outer shell- I borrowed this jacket from our son and I only wear this if I am standing around in wind.
- Windproof Pants – rain pants will work, but should have some ventilation. I got these Black Diamond Pants at REI for like 90% off since the zipper pull was missing.
- Pro-tip. Tuck everything into your pants to stay warm and look fancy. Tucking and untucking can be a good way to regulate the amount of warm air that is next to your body.
Footwear:
- Waterproof Hiking Boots: I have found that in shallow snow or on ice, that waterproof hiking boots were warmer than my Sorel Joan of Arctic boots because the soles are so thick. Note: the traction on these specific boots is NOT good for winter hiking and I gave them a second life by making them my dedicated winter hikers and permanently adding screws to the soles.
- Don’t tighten your laces too tight, especially around the arch and ball of your foot. Sometimes my feet got cold at the start of a hike. When this happens, I try to stop and loosen my laces and it usually resolves quickly. My tendency is to cinch up my boots tight for support, but that can restrict blood flow and compress fluffy insulating layers-both causing freezing toes!
Head/Face:
- Lightweight fleece or wool hat
- Heavyweight Leather Mad Bomber Hat: I only break this bad boy out when it’s super cold!
- Balaclava or Neck Gaiter: I use both. Today I tried out a new winter biking face mask that worked great, and I looked kind of hilarious.
- Lotion/Balm: Shea Butter, Warm Skin, lanolin or petroleum jelly all work great for protecting your face from the elements.
- Note on eye protection. Goggles are nice to have when its REALLY cold, but I have found that mine only work for a little while before they fog up, so I don’t use them very often.
Hands:
- Lightweight wicking gloves: non-cotton cheap magic gloves work.
- Mittens: Wool or insulated over your gloves – I use Gordini

Gear:
- Water Bottle(s)
- Avoid hydration bladders, the hose can freeze.
- To prevent freezing, bring in an insulated cup, store in your pack with insulation around it or wear a small water bottle around your neck under your jacket. I learned this nifty trick at my first Winter Scout Camp!
- Backpack
- A daypack big enough to stuff a coat and a few other things into. Straps with clips are nice to attach your snowshoes if you don’t want to wear them.
- 10 Essentials
- Especially in cooler or wet temps, you should always prepare for an extended time in the elements or unexpected night outside.
- Map
- Compass
- Whistle
- Headlamp (w/ extra batteries)
- First aid kit
- Fire starting materials
- Small knife, multi-tool, repair kit
- Shelter/extra clothing (I bring an 8oz tarp)
- High energy food
- Sun protection/chapstick

Optional items-depending on conditions:
-
- Extra socks & clothing, especially if you think you will get wet (sledding, skiing, unpredictable hiking partners…)
- Gaiters: Can be worn to keep your legs and shoes dry in deep snow or with trail runners instead of snow boots.
- Winter traction-Yaktrax, Microspikes, Snowshoes
- Chemical or re-usable hand warmers. I use these in my pocket to keep my phone from dying when it’s really cold out. These are also great to throw in your boots, mittens or pants pockets to keep your buns from freezing.
- A insulated skirt. I have various lengths and think they are a great way to target your layering system. They fit right over your pants and are a great way to add a warm layer if you stop moving or will be standing outside for long periods of time.
- Ski/Snowboard Goggles. Protects your eyes from the cold and sun.
- A warm drink in an insulated mug (avoid alcohol)
- A piece of foam, insulated or reflective material to sit on to keep your buns from freezing off if you want to have a seat. A recycled mailing envelope works pretty great and its free.

What is your favorite tip for staying warm while winter hiking? Share it in the comments below.
Happy Trails!
~WP
The title of this post is priceless! Thank you for the great advice on layering. I bought a used pair of snowshoes for running (Atlas) so I’m going to try them out this weekend. I’ll keep you posted!
Thanks, I hope it’s helpful. Woo hoo on the snowshoes! My favorite pr are Atlas, the bindings are super easy and they are pretty lightweight. Be sure to report back and let me know if you want to go hit a trail together. Been waiting for some good snow!